Welcome to the ultimate exploration of Dirflow, a groundbreaking tool that allows you to automate tasks effortlessly.
In this blog, we will dive deep into the features, advantages, and limitations of Dirflow, ensuring you have all the insights you need to make an informed decision.
This article is a written version of my Japanese video below, transformed into an English blog post.
???? Weekly Updates and Special Offers
Hey there! Let’s talk about what’s happening this week with Dirflow.
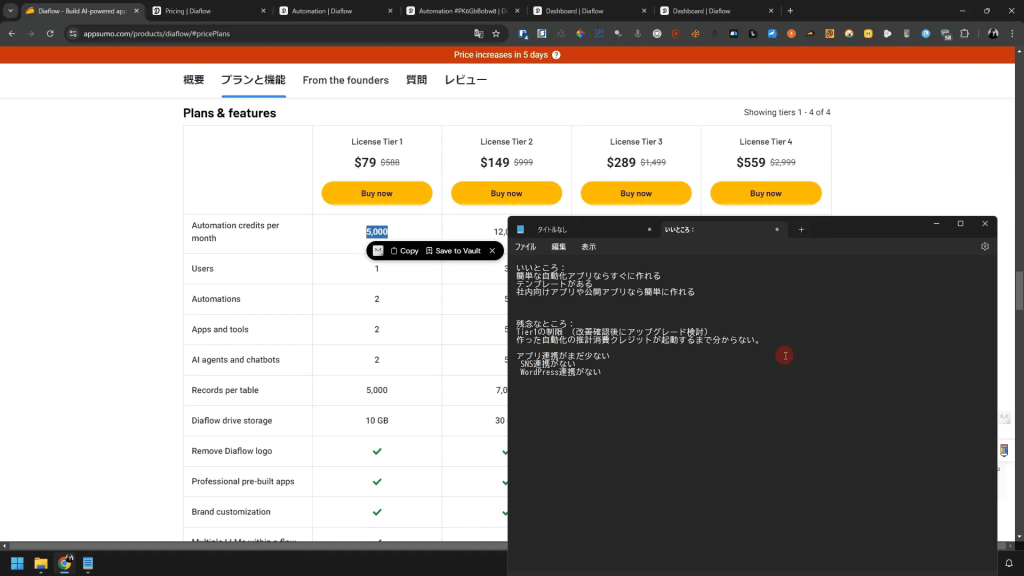
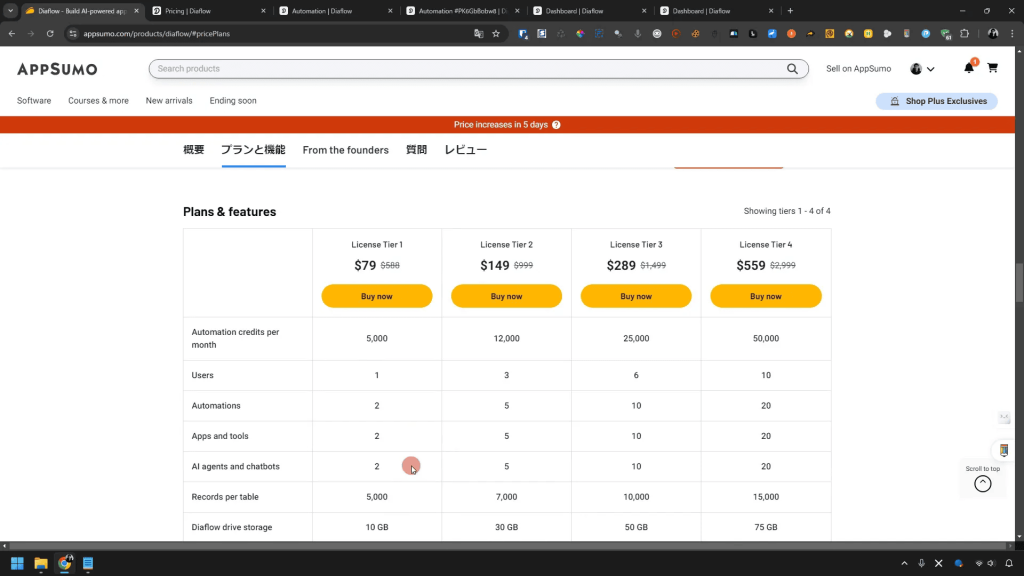
If you’re looking for some great deals, you’re in luck! Right now, you can snag Dirflow for a one-time payment of just $79.
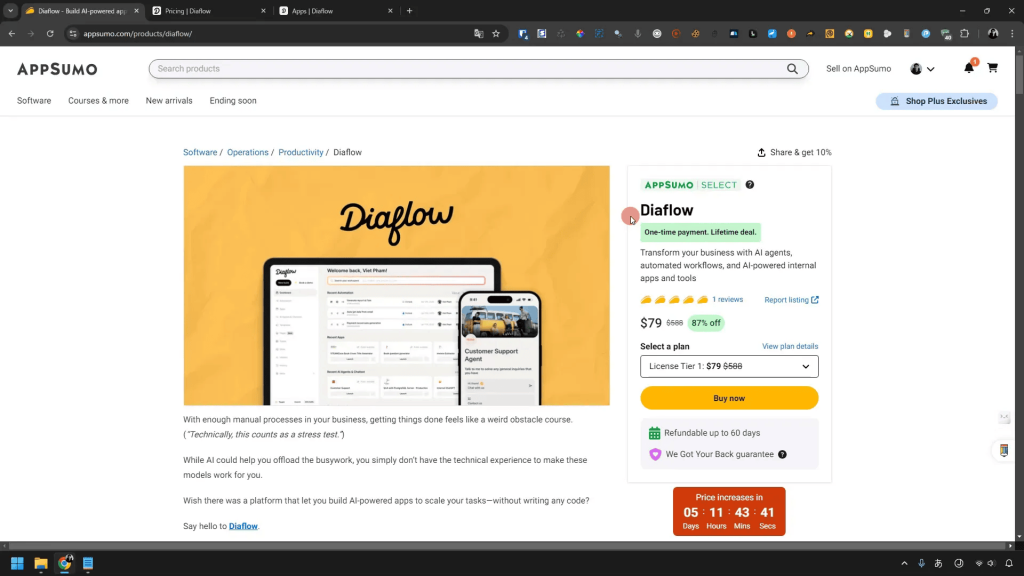
And the best part? Once you make that payment, you won’t see any additional fees popping up next month or next year.
It’s a solid investment for a tool that can make your life a whole lot easier.
But hold up! This offer isn’t going to last forever.
You’ve got about 3 days before the price jumps up.
So, if you’re interested, now’s the time to jump on it!
I’ve been testing Dirflow myself, and while I see a lot of potential, I also found some areas that need improvement.
So, while the tool is promising, I’d say there’s no need to rush into a purchase just yet.
???? Current Promotions
- One-time payment of $79
- No recurring fees
- Price increase in 3 days
So, if you’re on the fence, take a little time to explore what Dirflow offers.
It might be worth it to keep an eye on future updates and improvements before diving in.
But hey, if you see something you like, don’t hesitate!
???? What is Dirflow? Honest Review & First Impressions
Let’s get into the nitty-gritty of what Dirflow really is.
In simple terms, Dirflow is an automation tool designed to streamline your workflow.
Whether you’re a small business owner, a content creator, or just someone who juggles multiple tasks, Dirflow can help you automate repetitive tasks and save precious time.
From my experience, it’s not just about automating tasks but also about enhancing productivity.
The interface is user-friendly, making it easy for anyone to get started.
You don’t have to be a tech wizard to navigate through the features.
My first impression? It’s a promising tool with a lot of potential, but it does come with its share of pros and cons.
???? Pros and Cons
- Pros: User-friendly, time-saving automation, great for various applications.
- Cons: Some features still need refinement and improvement.
Overall, Dirflow is shaping up to be a handy tool.
It’s definitely worth exploring if you’re looking to enhance your productivity!
???? Is the Free Version Really That Bad? Differences from the Paid Version
Now, let’s address a common question: is the free version of Dirflow really that bad? The short answer is: it depends on what you need.
The free version gives you access to some essential features, but it does come with limitations.
You can create three automations, three applications, and design three AI agents.
That’s not too shabby for a free tool!
However, if you opt for the paid version, you’ll find that some functionalities are reduced.
For instance, the AppleZOO plan allows only two automations, two applications, and two AI agents.
Honestly, it feels a bit underwhelming compared to the free version.
It’s like getting less for more!
???? Free vs. Paid Version
- Free Version: 3 automations, 3 applications, 3 AI agents.
- Paid Version: 2 automations, 2 applications, 2 AI agents (which seems less).
So, if you’re considering Dirflow, I’d recommend sticking with the free version for now.
It gives you a taste of what the tool can do without any financial commitment.
Plus, it’s likely that the paid plan will see some improvements down the line.
???? Features and Cautions of the Unlimited Plan
Let’s talk about the unlimited plan that’s on the horizon! The Tier 4 plan is touted as having no limits on the number of applications and automations you can create.
This is a game changer for those who want to dive deep into automation without worrying about hitting a ceiling.
However, before you get too excited, it’s essential to approach this with caution.
While unlimited features sound fantastic, it’s crucial to consider the overall quality and functionality of these features.
If the basic functions are still in need of refinement, having unlimited options might not be as beneficial as it sounds.
⚠️ Key Considerations
- Unlimited applications and automations
- Potential for feature refinements needed
- Monitor updates and improvements
In short, while the unlimited plan sounds appealing, it’s wise to keep an eye on how Dirflow evolves.
The potential is there, but the execution is what will ultimately make or break its effectiveness.
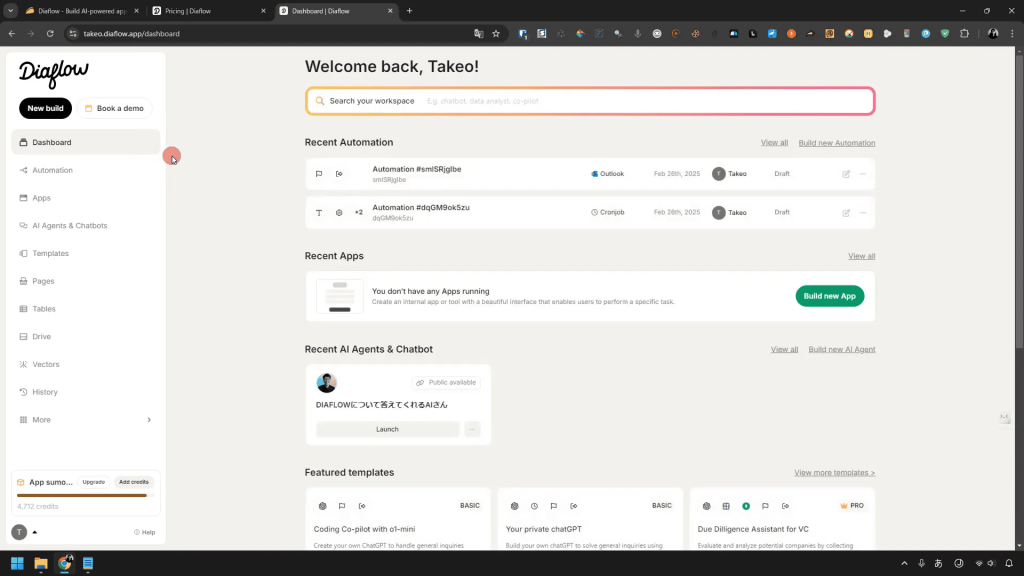
???? Exploring the Dirflow Dashboard
Alright, let’s dive into the Dirflow dashboard.
This is where the magic happens! From here, you can create various automations and applications.
If you’re a beginner, I highly recommend starting with the templates available.
They’re super helpful in guiding you through the process.
You’ll find templates for everything from generating blog posts to creating product descriptions and social media posts.
It’s like having a little helper by your side, making things a lot easier!
????️ Utilizing Templates
The templates are designed to be straightforward.
You just choose one, and it’ll guide you through the process step-by-step.
You might think it looks complicated at first glance, but trust me, it’s much simpler than it seems.
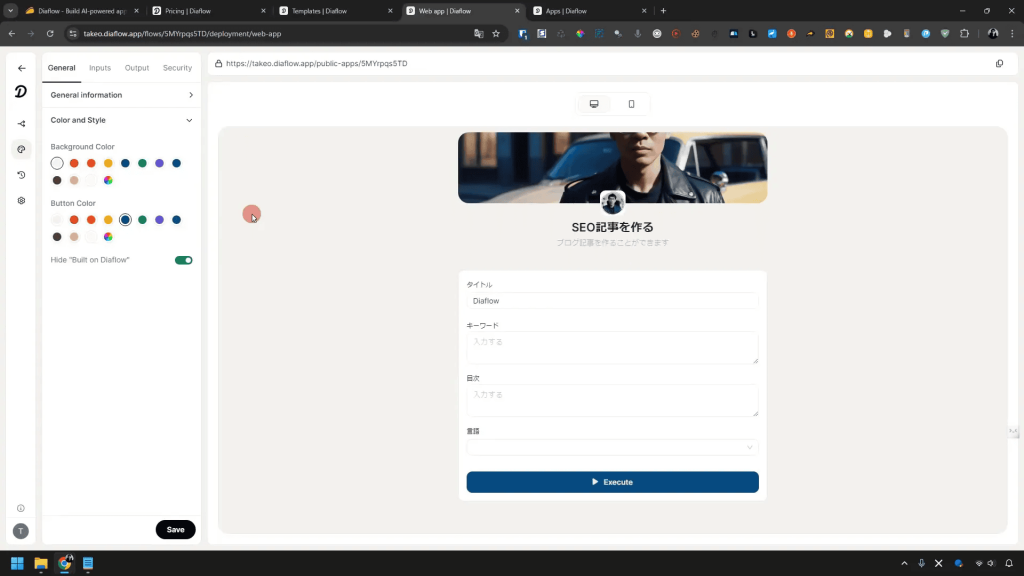
For example, if you’re using a template to create a blog post, you’ll enter your title, keywords, and table of contents.
Then, just select your language, and let the AI do the rest! The output will be a well-structured blog post based on your inputs.
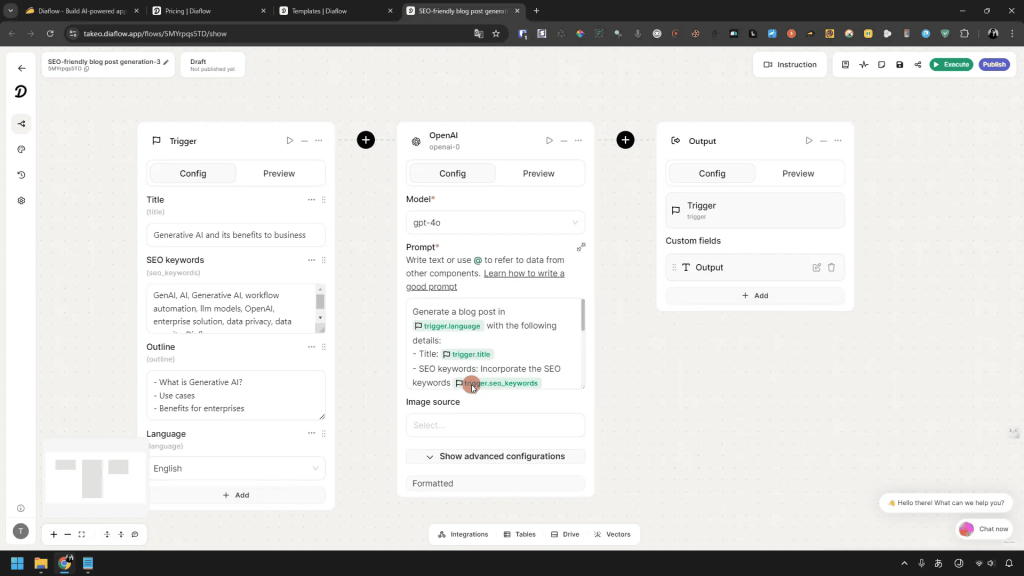
It’s impressive how quickly the AI can generate quality content.
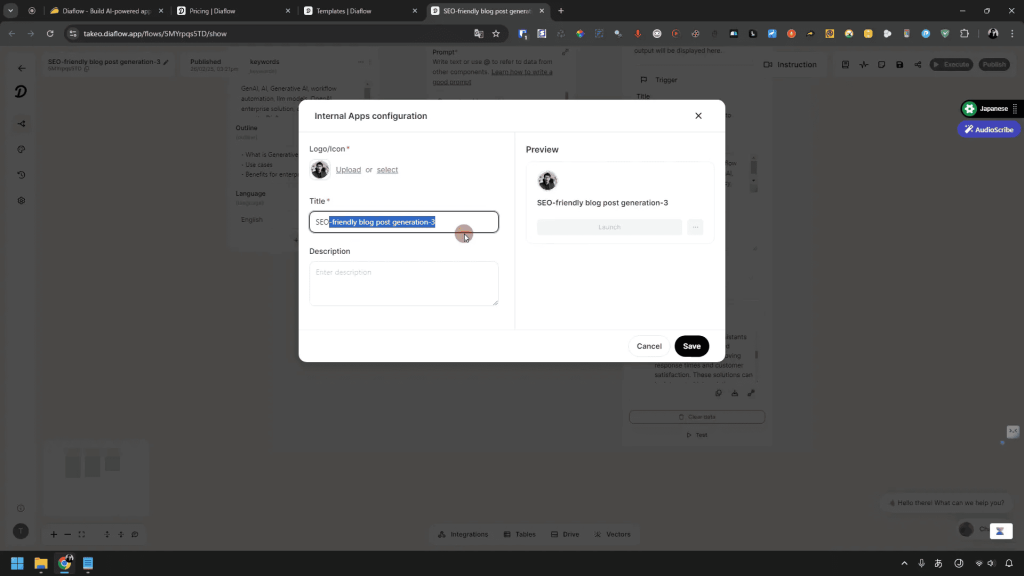
Plus, once you’ve created your content, you can easily customize the layout, add logos, and tweak the appearance to fit your brand.
It’s a fantastic way to present your work without spending hours on formatting!
???? Utilizing the ChatGPT Functionality
One of the standout features of Dirflow is its integration with ChatGPT.
This functionality allows you to generate content that feels natural and engaging.
Whether you’re crafting blog posts, product descriptions, or social media updates, using ChatGPT can elevate your writing game.
With this feature, you can input prompts, and the AI will generate text that aligns with your requirements.
It’s like having a writing assistant that’s always ready to help you brainstorm ideas or polish your drafts.
✨ Benefits of Using ChatGPT
- Generates high-quality, engaging content
- Helps overcome writer’s block
- Customizable to fit your tone and style
Incorporating ChatGPT into your workflow can significantly boost your productivity, allowing you to focus on other important tasks while the AI handles the heavy lifting of content creation.
???? Can Automated Blog Article Generation Really Work?
Now, let’s tackle the big question: can automated blog article generation really work? The answer is a resounding yes! With tools like Dirflow, you can create blog articles quickly and efficiently.
The key is to provide the right inputs and let the AI do its magic.
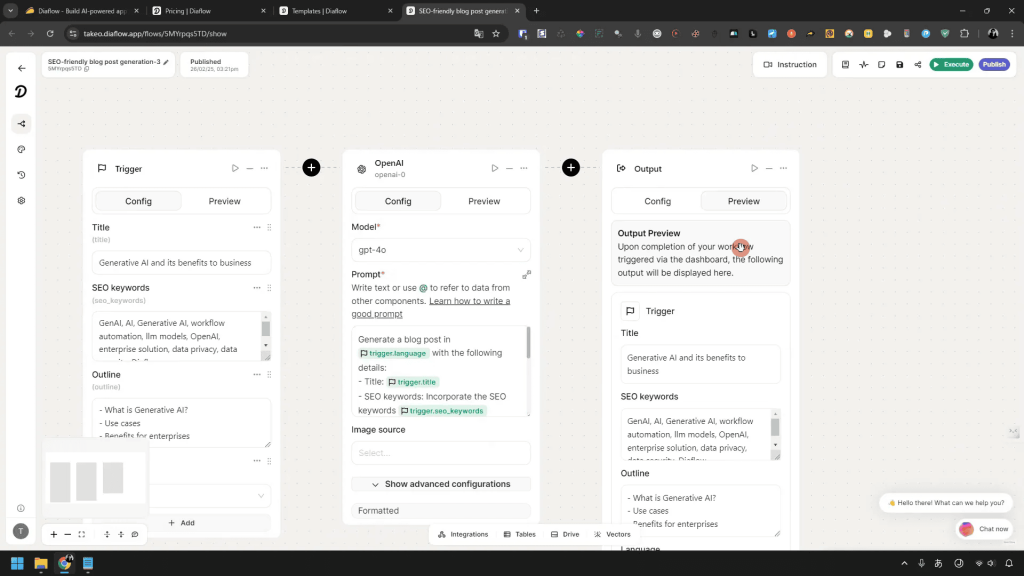
When using Dirflow’s blog generation feature, you’ll start by inputting your title, keywords, and other relevant details.
The AI takes this information and crafts a coherent and engaging article that meets your specifications.
???? Tips for Effective Blog Generation
- Provide clear and specific inputs
- Use keywords strategically
- Review and edit the output for personalization
While the AI can produce quality content, it’s always a good idea to review the output to ensure it aligns with your brand voice and meets your audience’s needs.
Remember, automation is a tool to enhance your creativity, not replace it!
???? Creating SEO Articles with Internal Applications
Creating SEO articles is a breeze with Dirflow, especially when you leverage its internal applications.
By using the templates designed for SEO, you can ensure your content is not only engaging but also optimized for search engines.
With features that allow you to input keywords and generate structured content, Dirflow helps you create articles that can rank well on search engines.
Just make sure to include internal links and relevant metadata to maximize your SEO efforts!
???? Key SEO Features
- Keyword integration for better visibility
- Structured content generation
- Ease of editing for SEO optimization
Using Dirflow for SEO articles can save you tons of time while ensuring your content is competitive in the digital landscape.
Just remember to review and tweak the output to fit your specific needs!
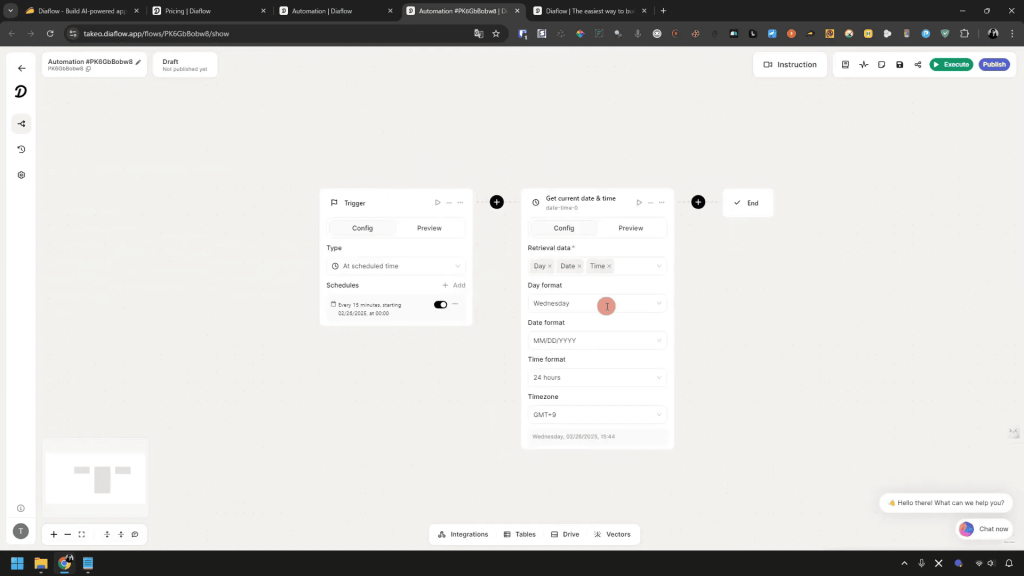
???? A Detailed Guide on How to Create Automation
Creating automation with Dirflow is as simple as pie! Let’s walk through the steps to set up your first automation.
First off, you’ll want to start by identifying the tasks you want to automate.
Think about repetitive tasks that eat up your precious time.
Got it? Great! Now, let’s dive in.
???? Step-by-Step Process
- Access the Automation Menu: Click on the automation button on the dashboard. It’s usually located in the main menu.
- Select Your Trigger: Here, you can choose what will kick off your automation. This could be a time-based trigger or an action like receiving an email.
- Define Your Actions: This is where the fun begins! Choose the actions that will happen once the trigger occurs. You can send emails, create tasks, or even generate content!
- Test Your Automation: Before going live, always test your automation. This ensures everything works smoothly and as expected.
- Activate and Monitor: Once you’re satisfied with the test results, activate your automation! Keep an eye on it to make sure it’s functioning correctly.
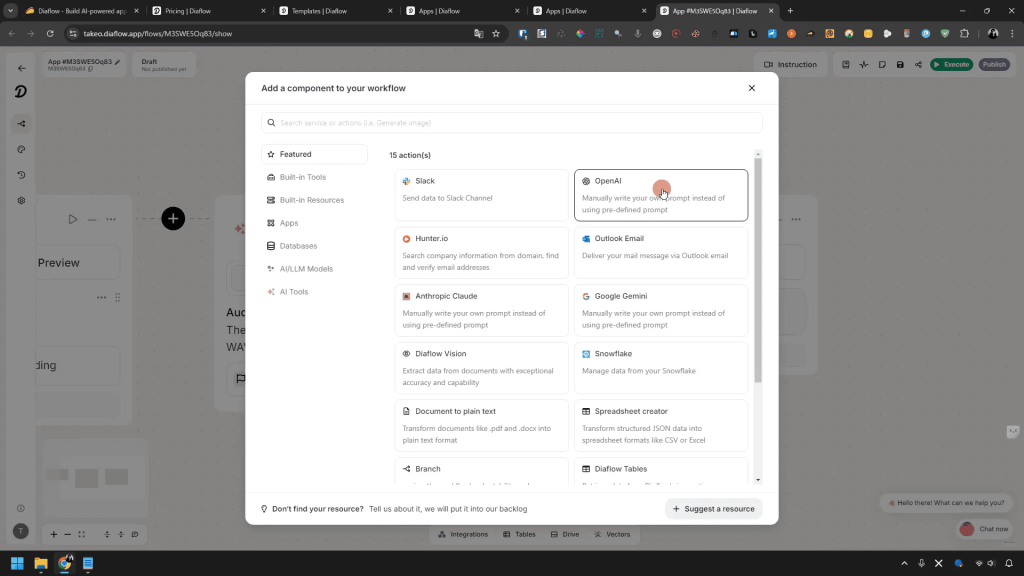
And there you have it! By following these steps, you can create automations that save you time and effort.
Remember, the key is to start small and build up as you get comfortable with the tool.
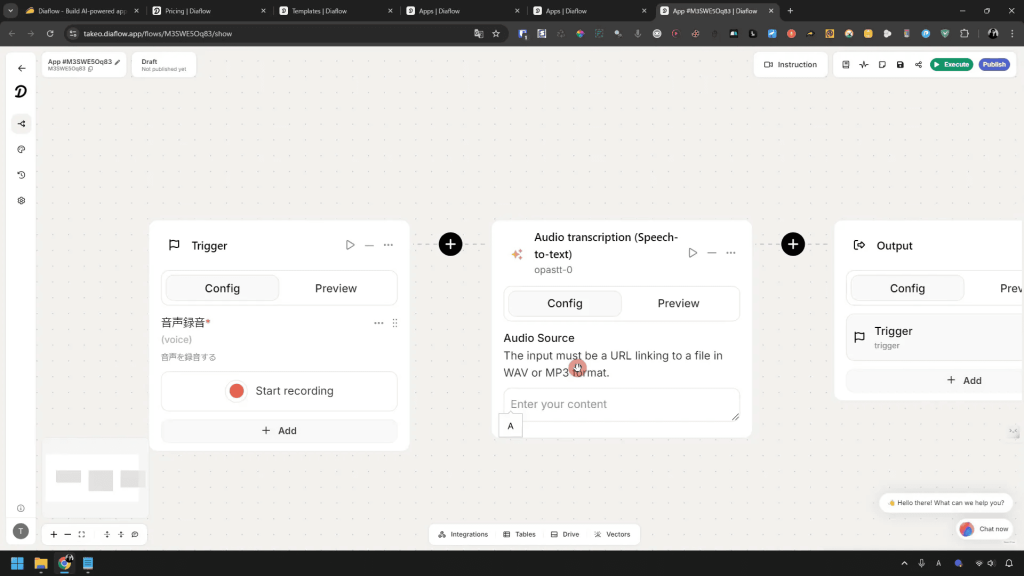
????️ How to Create Voice from Text
Ever wanted to convert your written content into voice? With Dirflow, it’s a breeze! This feature is perfect for creating audio content for podcasts or enhancing accessibility on your website.
???? Steps to Generate Voice from Text
- Open the Voice Generation Tool: Navigate to the text-to-voice section within Dirflow.
- Input Your Text: Copy and paste the text you want to convert into the provided field. Make sure it’s clear and concise for the best results!
- Select Voice Options: Choose the voice style you prefer. Dirflow offers various options, from cheerful to serious tones!
- Generate and Preview: Hit the generate button and listen to the preview. If it sounds good, you’re all set!
- Download or Share: Finally, download the audio file or share it directly to your platforms!
Creating voice from text not only saves time but also adds a personal touch to your content.
So, give it a go and see how it transforms your communication!
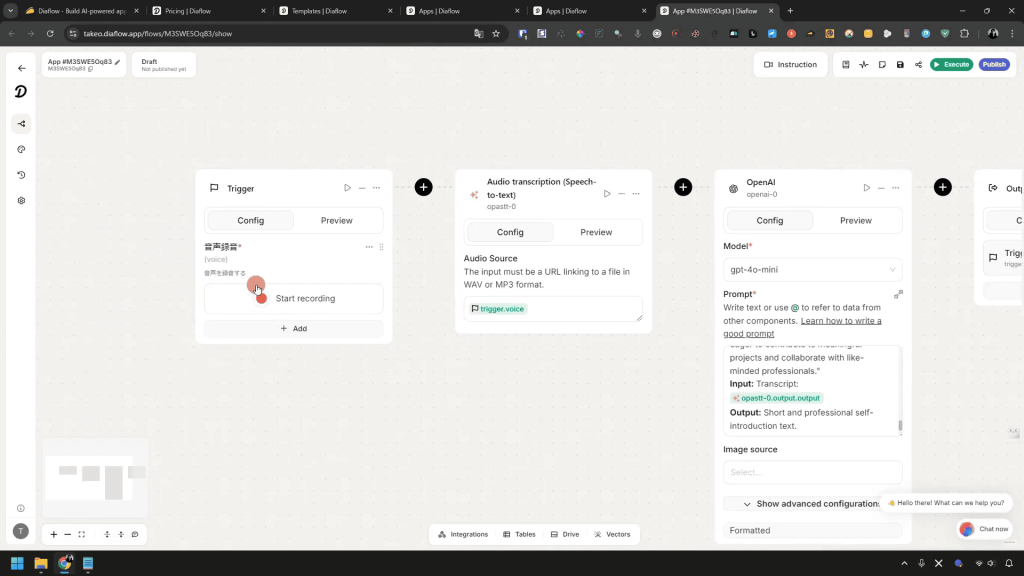
????️ Can AI Image Generation Really Work?
Let’s talk about the magic of AI image generation! With Dirflow, you can create stunning visuals from simple text prompts.
It’s a fantastic way to enhance your content without needing a graphic design degree.
????️ How to Generate Images
- Access the Image Generation Feature: Find the image creation tool in the menu.
- Enter Your Prompt: Type in a description of the image you envision. Be specific to get the best results!
- Select Image Size: Choose the dimensions you need, whether it’s for social media, blogs, or presentations.
- Generate the Image: Click the generate button and watch as your vision comes to life!
- Review and Download: Once the image is generated, review it. If it meets your expectations, download it for use!
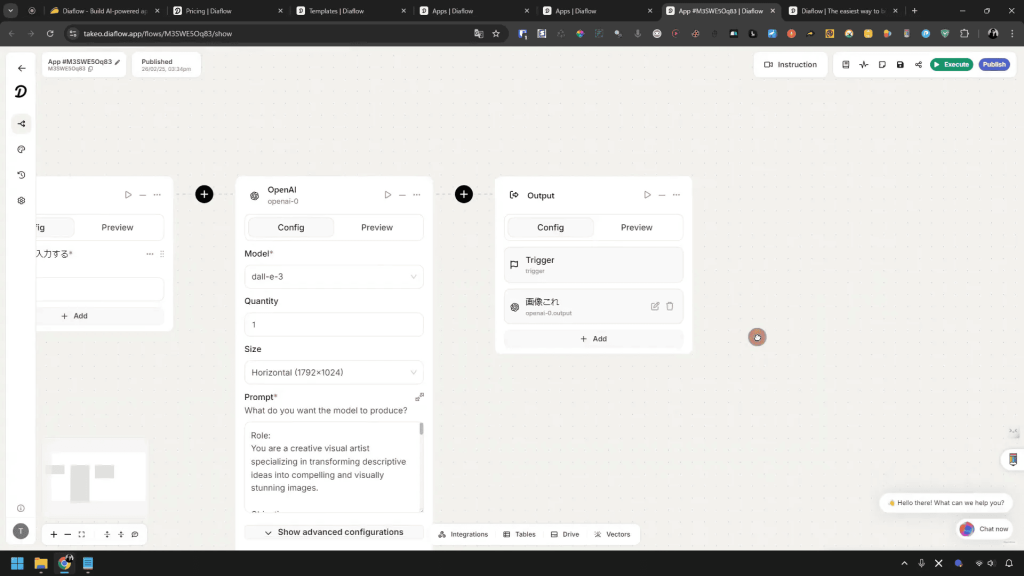
AI image generation can save you time and provide you with unique visuals that stand out.
It’s perfect for content creators looking to spice up their projects!
⚙️ Setting Up Advanced Automation
If you’re ready to take your automation skills to the next level, this section is for you! Advanced automation allows for more complex workflows that can significantly enhance your productivity.
???? Understanding Advanced Automation
Advanced automation can include multiple triggers, conditions, and actions.
Think of it as creating a flowchart where each step leads to another.
Here’s how to set it up:
- Choose Your Primary Trigger: This is the starting point of your automation.
- Add Conditions: Set conditions for when the automation should proceed. This could be based on time, user actions, or external data.
- Define Multiple Actions: For each condition, you can define different actions. For example, if a user signs up, send a welcome email and add them to a mailing list.
- Incorporate Loops and Delays: Use loops for repeated actions and delays for scheduled tasks.
- Test and Optimize: Always test your advanced automation to ensure it runs smoothly. Make adjustments as needed!
With advanced automation, the possibilities are endless! You can create workflows that adapt to user behavior, saving time and effort while providing a better experience.
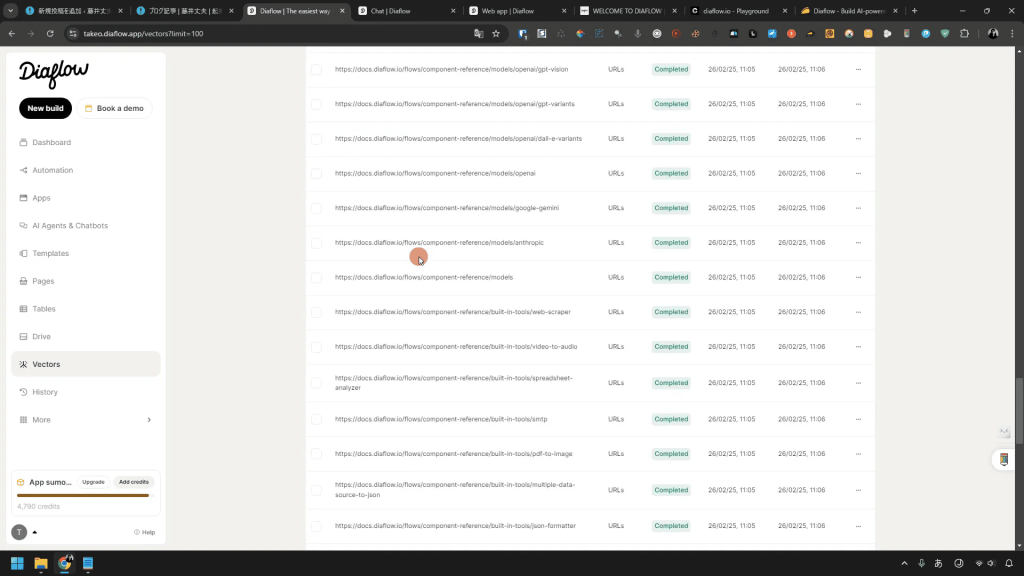
???? What is the Vector Function? Tips for Utilization
The Vector Function is a powerful feature in Dirflow that allows you to harness information effectively.
By providing data sources, you can create chatbots or automate responses based on that information.
???? Tips for Using the Vector Function
- Provide Relevant Data: Ensure the information you input is accurate and relevant to the tasks you want to automate.
- Use Clear Prompts: When creating responses, make your prompts as clear as possible to get the desired output.
- Test Different Inputs: Experiment with various data sources and prompts to see what works best for your needs.
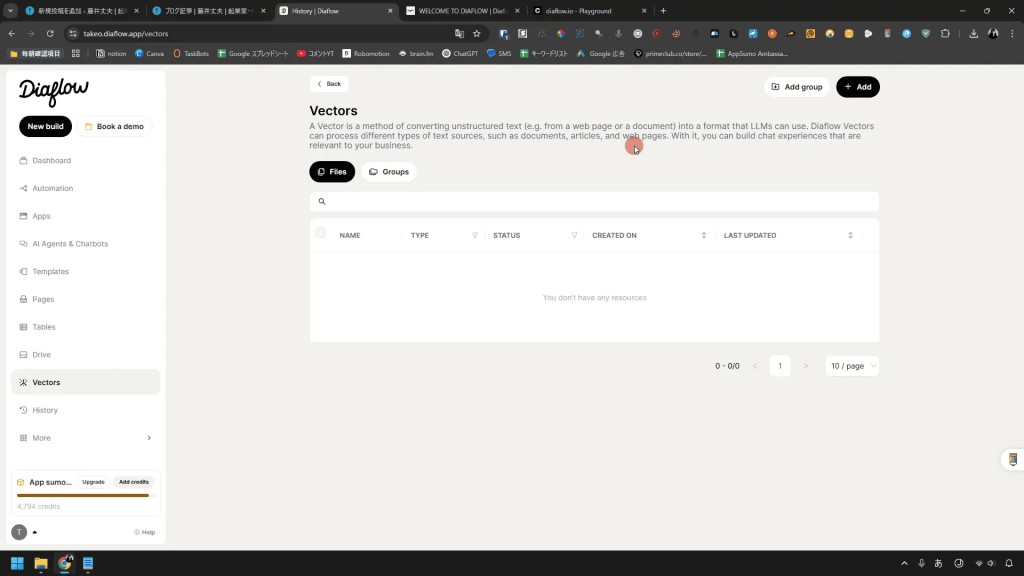
Utilizing the Vector Function can significantly enhance the capabilities of your automation.
It’s all about feeding it the right information!
???? Specific Uses of the Vector Function
The Vector Function can be applied in various scenarios to optimize your workflow.
Here are some specific uses:
???? Applications of the Vector Function
- Chatbots: Create intelligent chatbots that can answer user queries based on the data provided.
- Data Analysis: Use it for analyzing large sets of data and generating insights automatically.
- Content Generation: Generate content based on existing data sources, making it easier to produce relevant articles or posts.
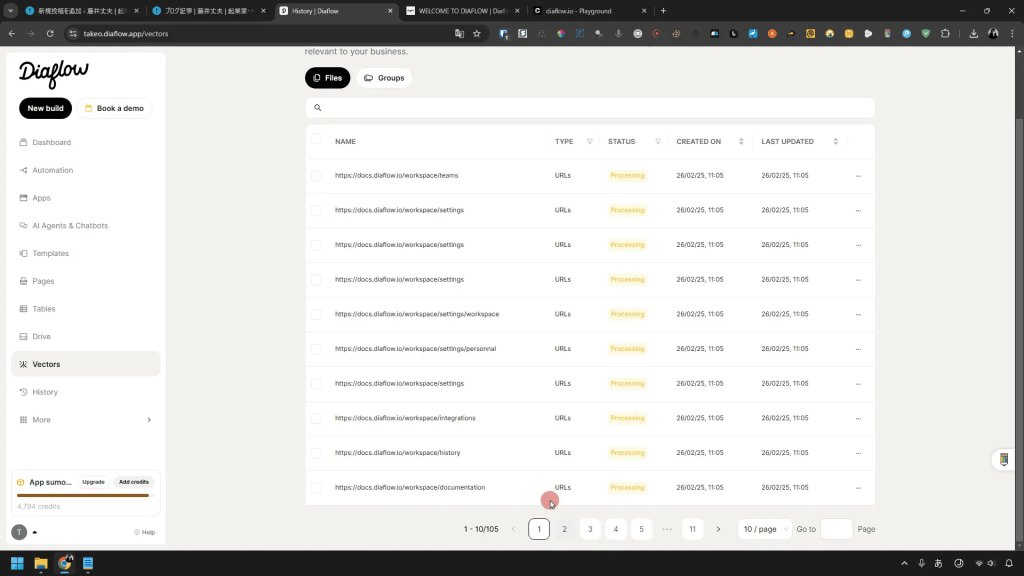
By leveraging the Vector Function, you can create more dynamic and responsive automations that cater to your audience’s needs!
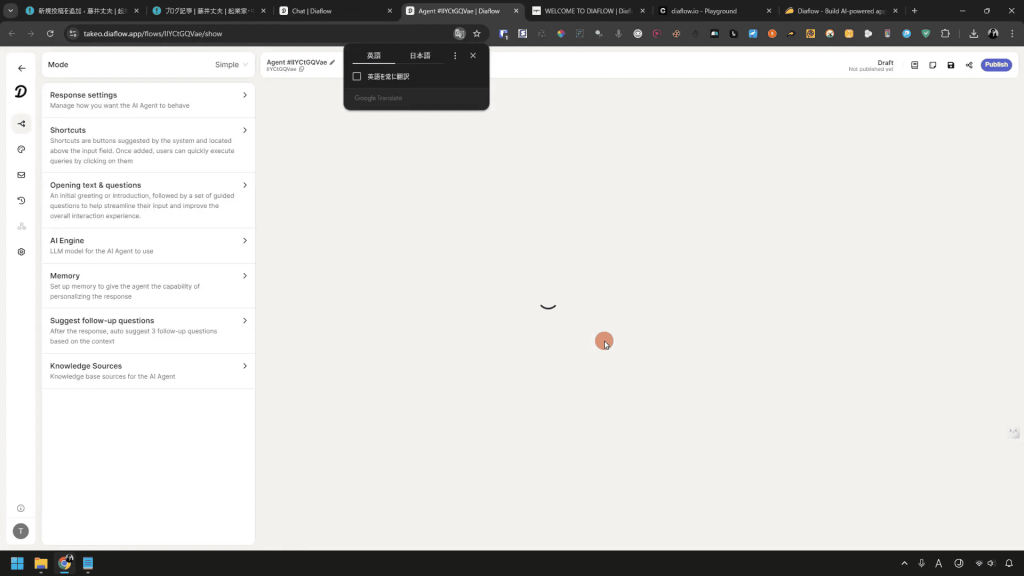
???? How to Create an AI Agent
Creating an AI agent is a game changer! With Dirflow, you can build your own AI that can respond to queries and provide information based on your specifications.
????️ Steps to Create Your AI Agent
- Access the AI Agent Creation Tool: Find it in the Dirflow dashboard.
- Define the Purpose: Clearly outline what you want your AI agent to do. This will guide the setup process.
- Set Up Responses: Input the responses your AI should give based on user queries.
- Integrate Data Sources: Use the Vector Function to provide your AI with relevant data.
- Test Your AI Agent: Run tests to see how your AI responds to different queries and make adjustments as necessary.
Your AI agent can become an invaluable tool for customer support, content generation, and much more.
The more effort you put into its setup, the better it will perform!
???? Easy Chatbot Creation for Beginners
If you’re new to chatbots, Dirflow makes the process super easy! You don’t need to be a tech expert to create one.
???????? Steps for Beginners
- Choose a Template: Start with a pre-built template that suits your needs.
- Customize Your Bot: Modify the bot’s responses and appearance to match your brand.
- Set Triggers: Define what will trigger the bot’s responses, such as keywords or user actions.
- Test Your Chatbot: Run tests to ensure it responds correctly to user inputs.
- Publish Your Chatbot: Once satisfied, publish it for users to interact with!
By following these steps, you can have a fully functional chatbot in no time.
It’s a fantastic way to engage with your audience and provide immediate support!
????️ Testing and Improvement Points for Chatbots
Testing your chatbot is crucial to ensure it meets user expectations.
Here are some points to focus on during testing:
???? Key Testing Areas
- User Experience: Ensure the chatbot is easy to interact with and responds accurately.
- Response Accuracy: Test various user queries to see if the chatbot provides the correct information.
- Load Handling: Check how the chatbot performs under high traffic to ensure it can handle multiple users.

Regularly updating and improving your chatbot based on feedback will enhance its performance and user satisfaction.
???? How to Publish Your Created Chatbot
Once you’ve created and tested your chatbot, it’s time to publish it! Here’s how to do it smoothly:
????️ Steps to Publish Your Chatbot
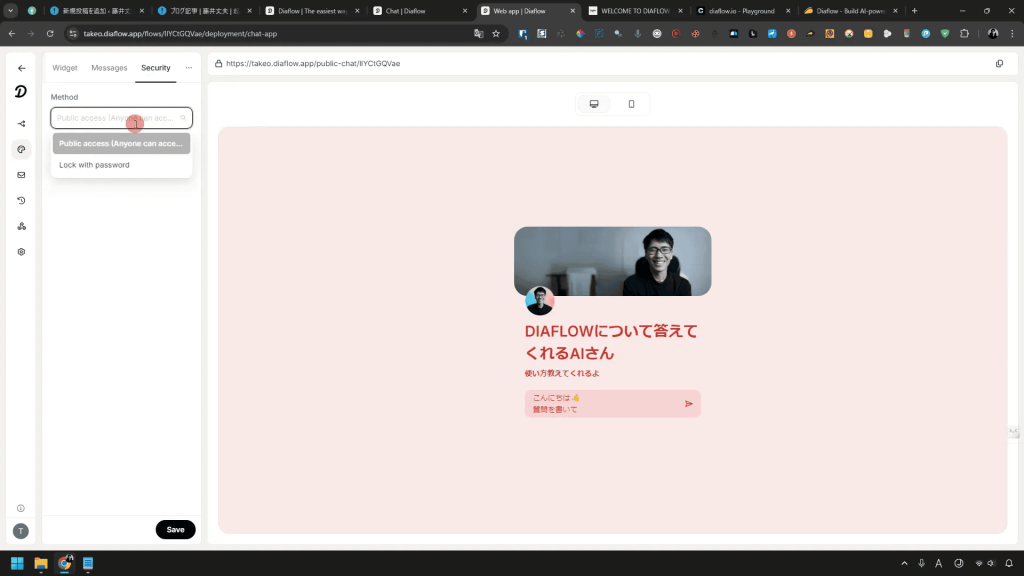
- Access the Publishing Menu: Find the publish option in your chatbot settings.
- Choose Your Audience: Decide if it will be for internal use or publicly available.
- Customize Appearance: Make any final adjustments to the chatbot’s look and feel.
- Publish: Click the publish button and celebrate your new chatbot!
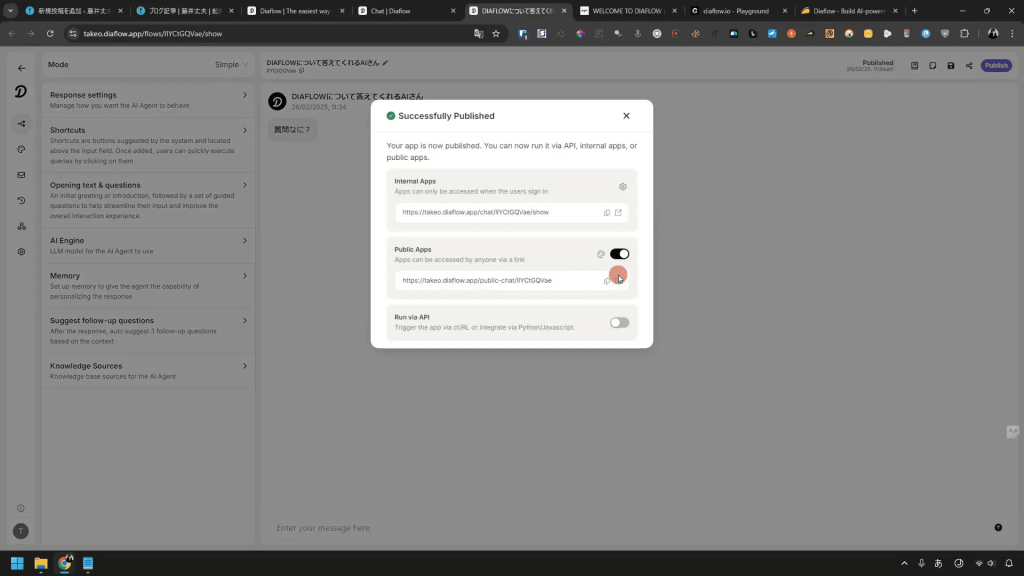
Publishing your chatbot opens up a world of possibilities for engaging with your users.
Don’t forget to promote it and gather feedback for future improvements!
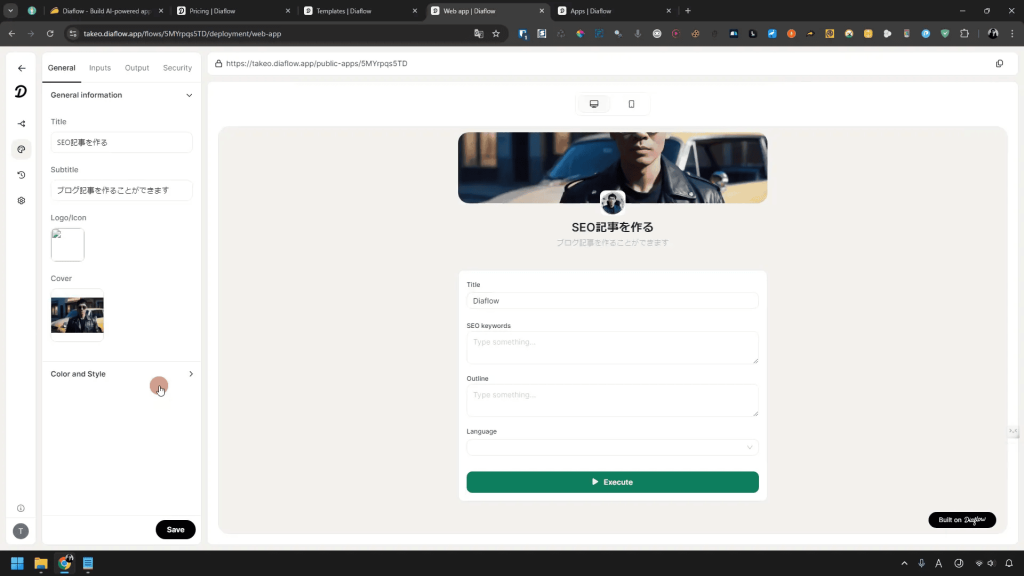
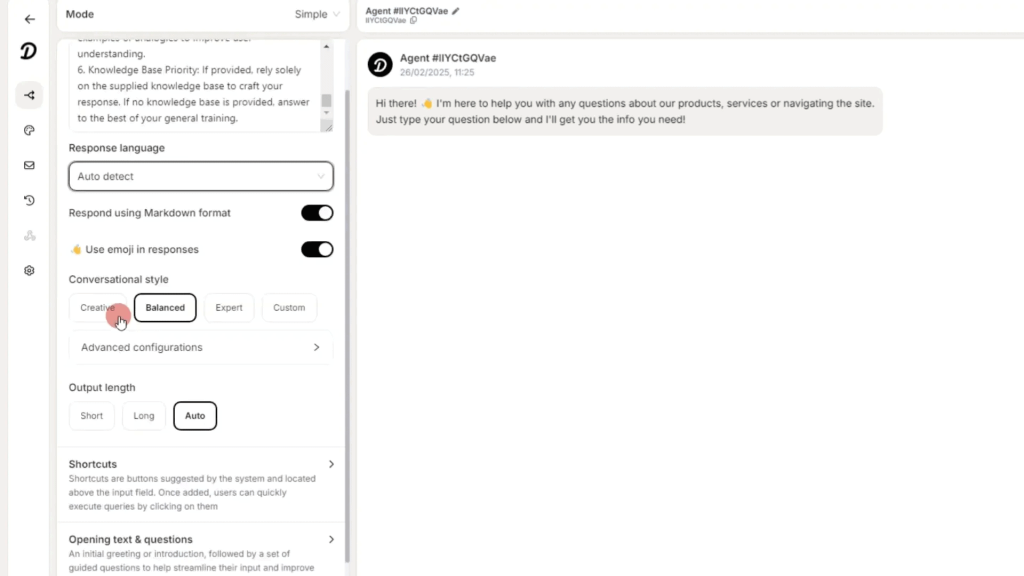
???? Customizing the Design of Your Chatbot
When it comes to customizing your chatbot, Dirflow makes it a breeze! You can tweak the design to match your brand’s personality.
From colors to fonts, every detail can be adjusted to create a seamless experience for your users.
First, let’s talk about the interface.
You’ll find it straightforward and intuitive.
You can easily navigate through design options without feeling overwhelmed.
Need to change the background color? No problem! Want to add your logo? Just a few clicks, and you’re set!
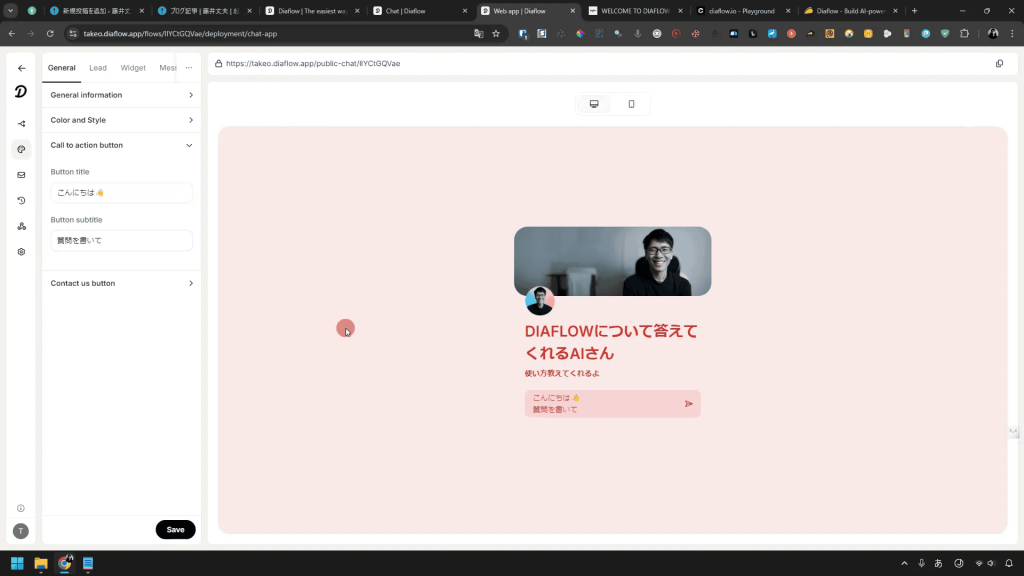
???? Key Customization Features
- Color Schemes: Choose a palette that reflects your brand.
- Fonts: Select from various font styles to enhance readability and aesthetic appeal.
- Logo Integration: Upload your logo for a professional touch.
- Responsive Design: Ensure your chatbot looks great on all devices, whether mobile or desktop.
Don’t shy away from experimenting with different designs.
The more you play around, the better your chatbot will resonate with your audience!
???? Practical Uses of AI Chatbots
AI chatbots can revolutionize how you interact with your audience.
They’re not just for customer service anymore.
With Dirflow, you can leverage chatbots across various domains to enhance engagement and efficiency.
???? Areas Where Chatbots Shine
- Customer Support: Provide instant responses to common queries, reducing wait times.
- Lead Generation: Collect user information seamlessly through interactive conversations.
- Feedback Collection: Use chatbots to gather insights and feedback from your audience.
- Content Delivery: Share updates, articles, or promotional material directly through the chatbot.
Implementing chatbots in these areas can save time and improve customer satisfaction.
Plus, the more you use them, the smarter they become!
???? Overall Evaluation of Dirflow (Conclusion)
In evaluating Dirflow, it’s clear that this tool has a lot to offer.
Its user-friendly interface and powerful features make it suitable for both beginners and experienced users.
However, it’s essential to weigh the pros and cons before diving in.
On the upside, Dirflow allows for easy automation and customization.
The ability to integrate with AI functionalities is a game changer for content creators and businesses alike.
Yet, there are limitations in terms of functionality and pricing that may give potential users pause.
???? Final Thoughts
- Strengths: User-friendly, versatile applications, and strong AI integration.
- Weaknesses: Some features need refinement, and limitations in the free version can be frustrating.
Overall, Dirflow is a promising tool.
If you’re looking to enhance your productivity and streamline your workflows, it’s worth considering.
Just keep an eye on future updates to see how the platform evolves!
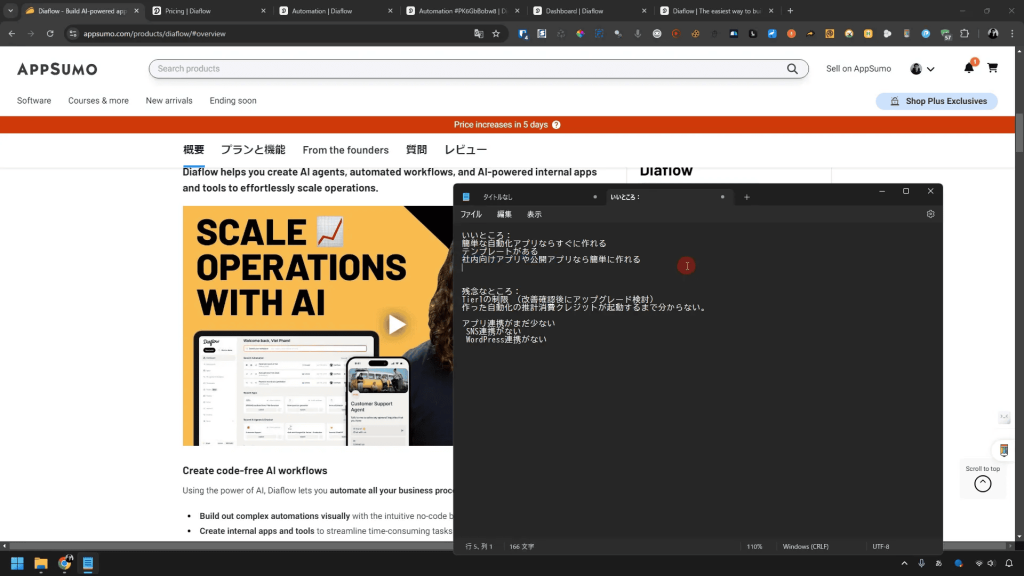
???? Pros and Cons of Dirflow: An Honest Review
Let’s break down the pros and cons of Dirflow to give you a clearer picture of what to expect.
???? Pros
- Easy to Use: The intuitive design makes it accessible for all users.
- Versatile Applications: Suitable for various use cases from content creation to customer service.
- AI Capabilities: Leverage advanced AI features for better automation and interaction.
???? Cons
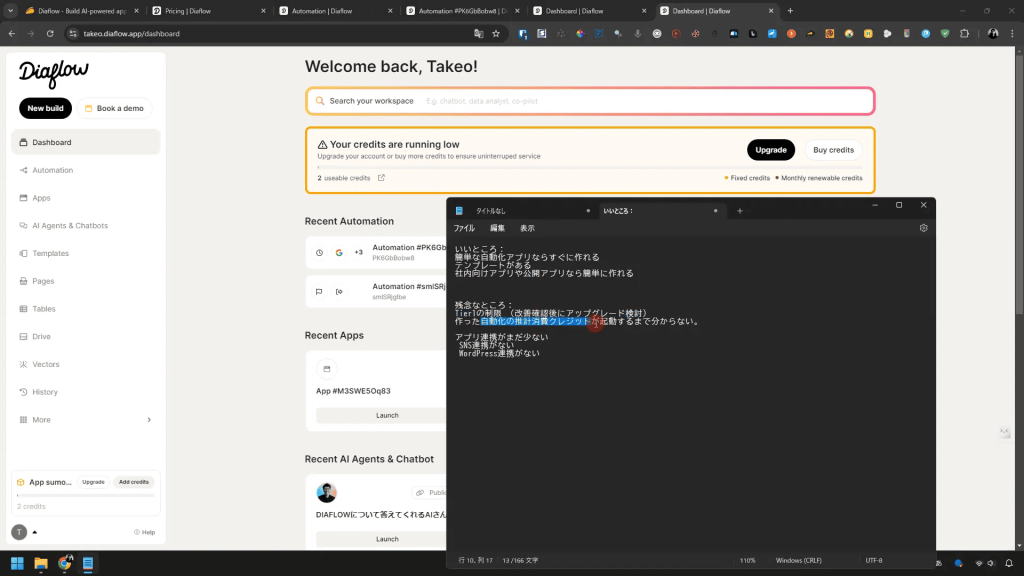
- Limited Free Version: The free version offers fewer features than expected.
- High Credit Consumption: Some automations consume credits rapidly, which can be a drawback.
- Integration Issues: Limited integration with third-party applications at this time.
While Dirflow has significant advantages, it’s important to consider these drawbacks.
A well-informed decision will help you maximize your investment!
????️ What Needs Improvement in Dirflow?
Every tool has room for improvement, and Dirflow is no exception.
Here are a few areas where enhancements could make a significant impact:
- Feature Expansion: More integrations with popular applications would enhance usability.
- Credit System Transparency: Users should have clearer insights into credit consumption rates before executing tasks.
- Increased Limits: Raising the limits on the free and paid versions would make the tool more appealing.
By addressing these areas, Dirflow could solidify its position as a top-tier automation tool.
As users, we can hope for these updates in future releases!
???? Summary: Is Dirflow Worth Buying? Final Evaluation
So, is Dirflow worth the investment? The answer largely depends on your needs and expectations.
If you require a tool for automation and content generation, Dirflow offers a solid foundation with potential for growth.
However, if you’re looking for extensive features right out of the gate, you might find the current limitations a bit frustrating.
It’s essential to weigh the pros and cons and consider your specific use case.
???? Final Recommendation
If you’re curious about automation and want to explore its capabilities, Dirflow is worth a try.
Just be aware of its current limitations and keep an eye on future updates for improvements.
The tool has the potential to become a must-have in your productivity arsenal!
???? Message to Viewers & Next Episode Preview
Thanks for sticking with me through this deep dive into Dirflow! I hope you found this information helpful as you explore automation tools.
Remember, the world of AI is constantly evolving, so stay curious!
In the next episode, we’ll explore more advanced features and show you how to maximize your use of Dirflow.
Don’t miss it! Make sure to subscribe and hit that notification bell so you never miss an update!
❓ Frequently Asked Questions about Dirflow
Here are some common questions users have about Dirflow:
???? FAQs
- What is the main purpose of Dirflow? Dirflow is designed to automate tasks and streamline workflows using AI technology.
- Is there a trial version available? Yes, Dirflow offers a free version with limited features to help you get started.
- Can I integrate Dirflow with other tools? Currently, integration options are limited, but updates are expected in the future.
- How does the credit system work? The credit system is used for automating tasks, and usage can vary depending on the complexity of the tasks.
If you have more questions, feel free to leave them in the comments below! I’ll be sure to address them in future videos!